Set up your AI Receptionist in 10 minutes.
This guide walks you through every step — from your first login to a fully working AI receptionist that answers calls, books appointments, and sends follow-ups.
Business Details
~2 minutesStart by telling FlowEdge AI about your business. This information is used by your AI receptionist to answer questions about your company accurately.
Fields explained
Your AI will use this name when greeting callers — e.g. "Thanks for calling Smith's Auto Services."
Your existing business phone number. Callers will still dial this — FlowEdge AI answers when you can't.
Where call summaries and transcripts will be sent after every AI-handled call.
Helps your AI give accurate directions and location info to callers.
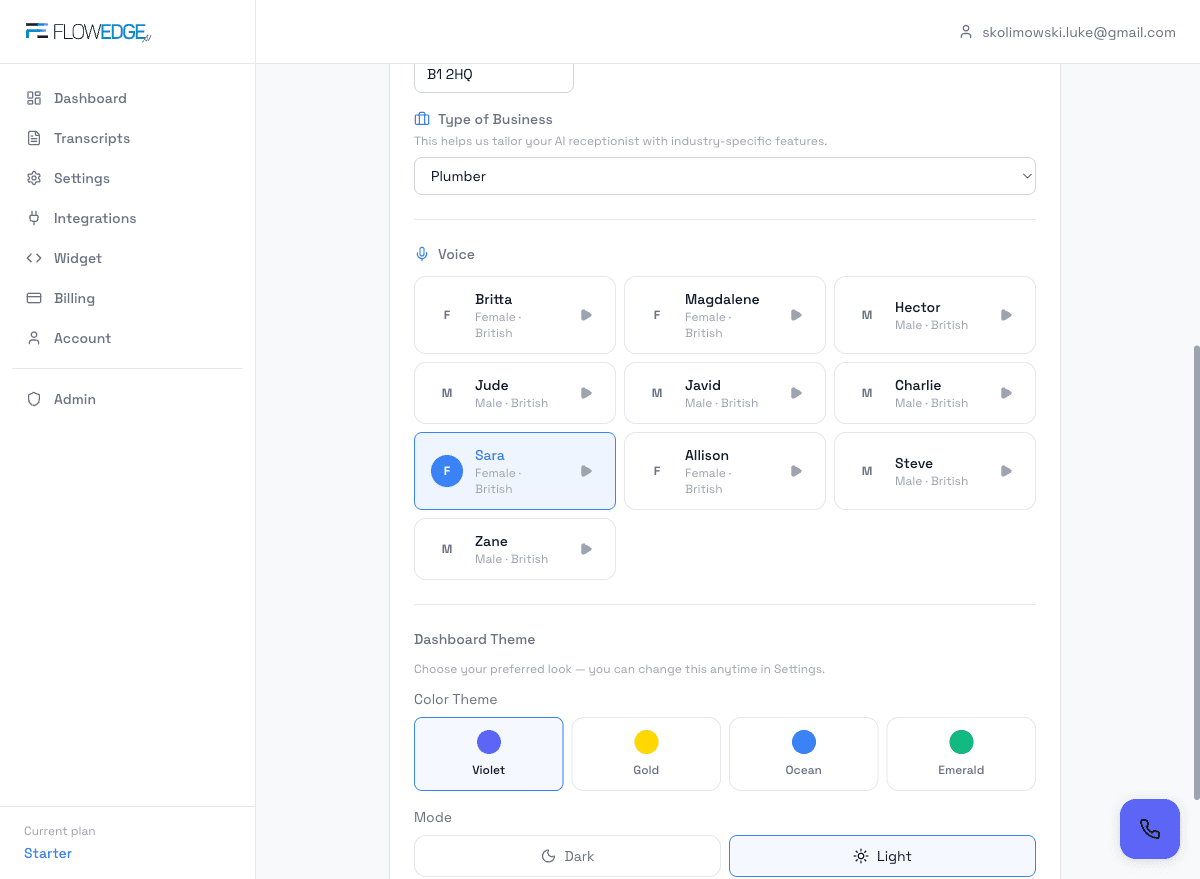
Selects the right AI features and pre-fills relevant default services. Over 55 business types across automotive, trades, healthcare, beauty, hospitality, and more.
Choose the British voice your AI will speak in. Click the play button to preview any voice before selecting.
Purely cosmetic — choose a colour scheme (violet, gold, blue, emerald) and light or dark mode. Change anytime in Settings.
- Business Name, Phone, Email, and Business Type are required before you can proceed.
- You can preview each voice by clicking the play button — listen before you commit.
- Not sure which voice to pick? Sara and Allison are the most popular with UK customers.
Business Hours
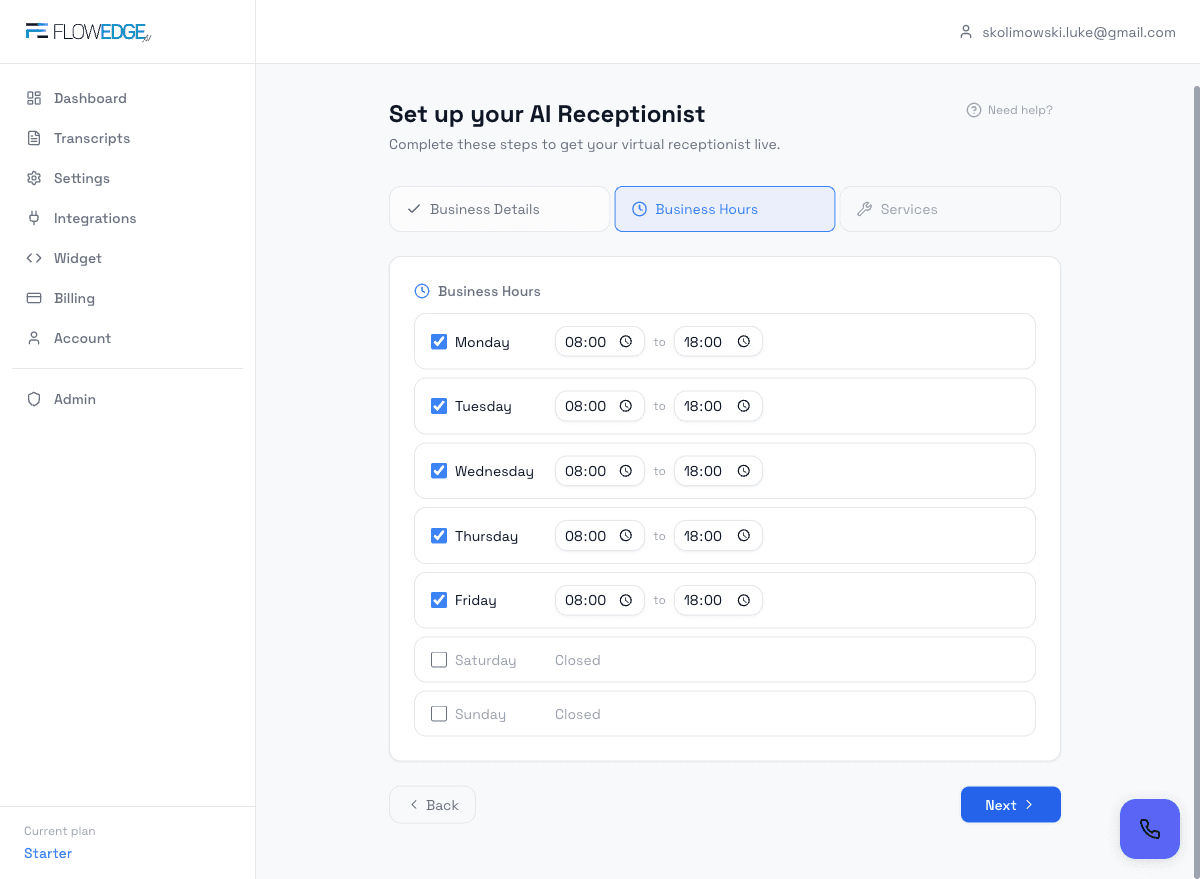
~1 minuteSet the days and times your business is open. Your AI receptionist uses these hours to tell callers when you're open, when you're closed, and what to expect after hours.
Fields explained
Check the days you're open. Unchecked days show as "Closed" — the AI will let callers know.
Set your exact opening and closing times per day. The AI uses these for real-time availability responses.
- Monday to Friday 08:00–18:00 is pre-filled as a sensible default — adjust to match your actual hours.
- If you work Saturdays, tick Saturday and set your hours. Common for garages, salons, and hospitality.
- Your AI answers calls 24/7 regardless — these hours just inform what it tells callers about your availability.
- At least one day must be marked as open before you can proceed.
- Get these right before going live — if you're open Saturday but haven't ticked it, your AI will incorrectly tell callers you're closed.
Services & Pricing
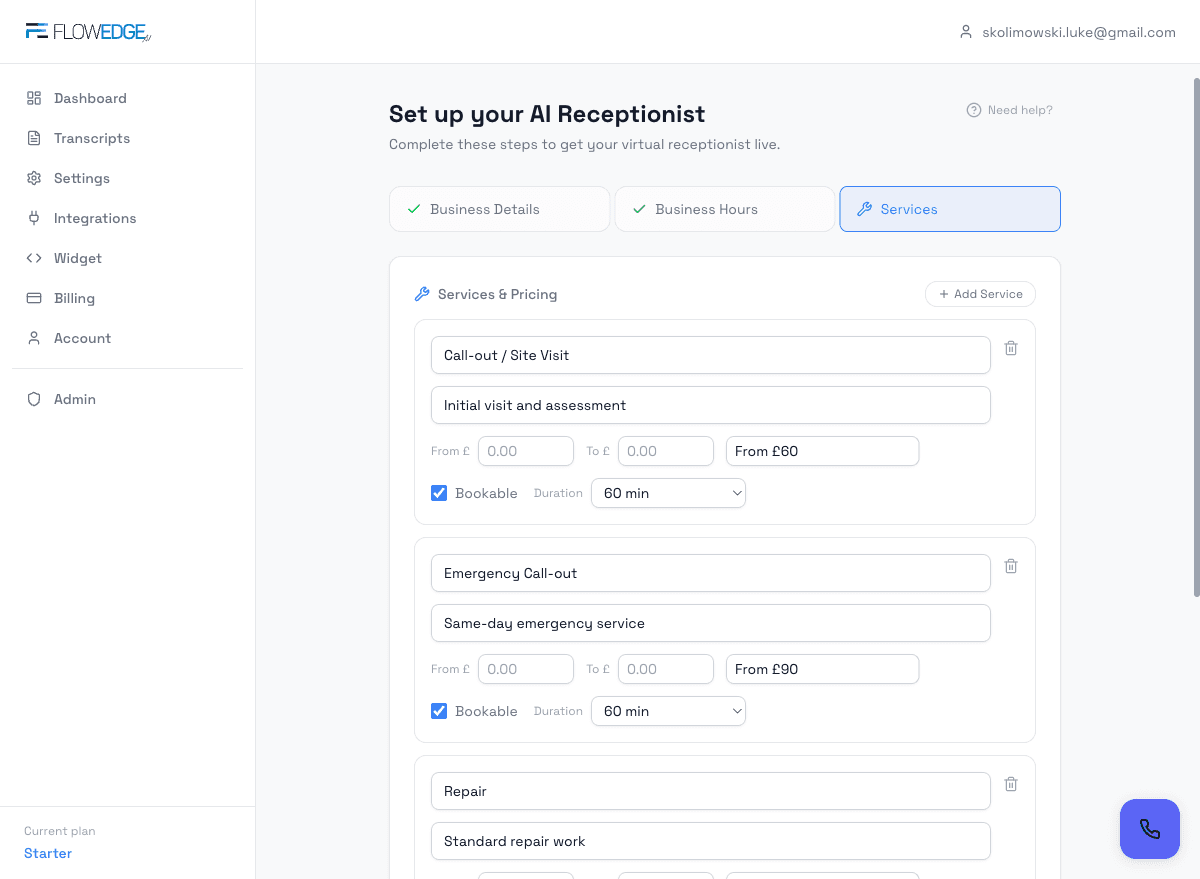
~3 minutesAdd the services your business offers along with pricing. Your AI will quote these prices accurately to callers and, for bookable services, will offer to book an appointment on the spot.
Fields explained
Keep it clear and recognisable — e.g. "MOT Test", "Consultation", "Cut & Style", "Emergency Call-out".
A short sentence the AI can use to explain the service — e.g. "Annual MOT test — Class 4 vehicles".
Set a "From" price and optionally a "To" price for ranged pricing. Leave "To" blank for a fixed price.
This is what the AI actually says to callers — e.g. "£45", "£149–£249", "From £60 per tyre", "Free quote".
Tick if customers should be able to book this service via the AI. Requires Google Calendar or GoHighLevel for live booking.
How long the service takes. Used by the booking system to block the right slot in your calendar.
- Click "+ Add Service" to add as many services as you like — there's no limit.
- Default services are pre-filled based on your business type. A plumber sees call-out/emergency/repair; a salon sees cut/colour/facial.
- Even if you're not using Google Calendar yet, add your services and prices. The AI will quote them to callers immediately.
- You can edit, add, or remove services at any time after setup from Settings.
- At least one service with a name is required before you can complete setup.
- If you leave Bookable ticked but haven't connected Google Calendar, the AI will attempt to book but won't succeed. Either untick Bookable or connect a calendar first.
Choose Your Plan
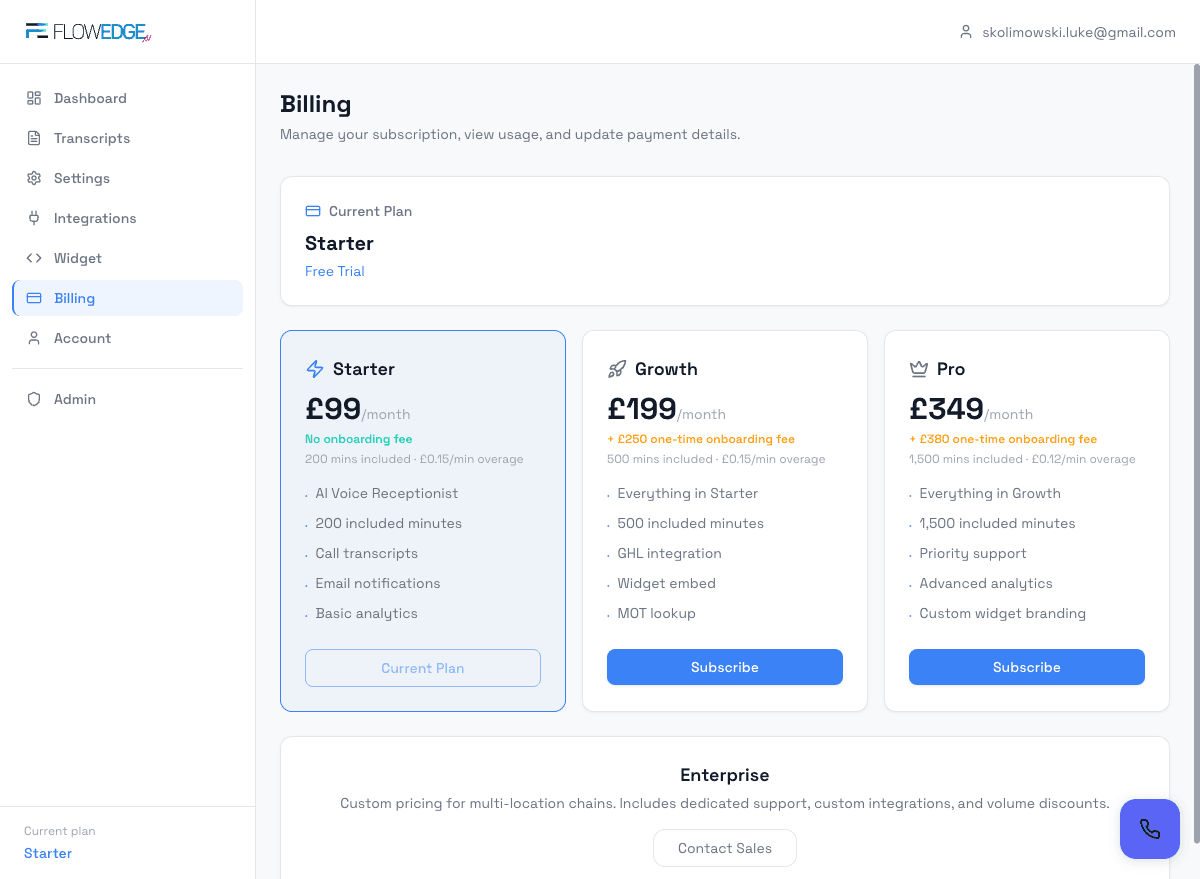
~1 minuteAfter completing the 3-step setup, you'll land on the Billing page. Choose a plan that fits your call volume and complete payment via Stripe.
Details
200 minutes included. Perfect for local trades getting started.
500 minutes included. For busy garages and service businesses.
1,500 minutes included. For high-volume, multi-service operations.
Custom minutes and pricing. For multi-location chains.
- All plans include a 30-day money-back guarantee — no free trial needed.
- You can upgrade or downgrade at any time from Dashboard → Billing.
- Overage is charged at £0.15/min (Starter & Growth) or £0.12/min (Pro).
- Your AI receptionist won't process calls until you have an active subscription.
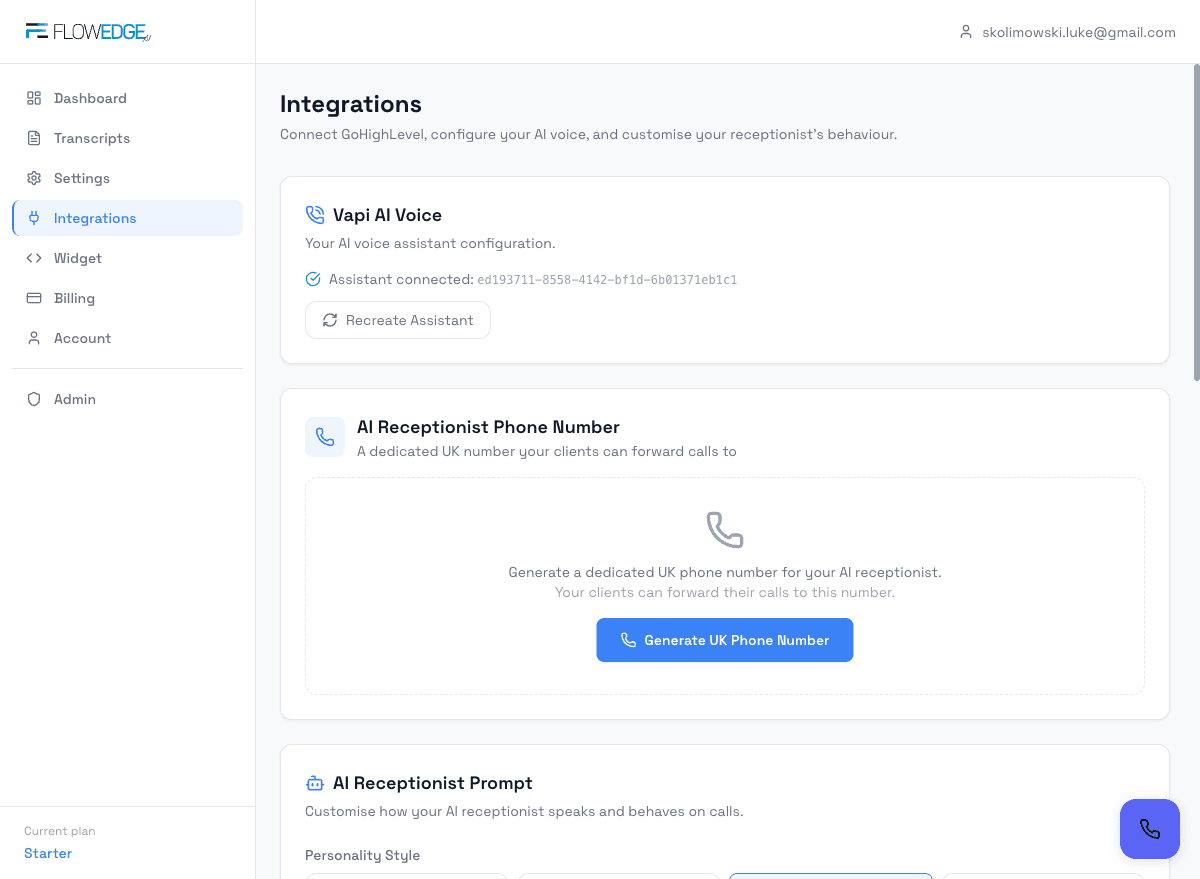
Connect Your Integrations
~5 minutesHead to Dashboard → Integrations to connect the services that power your AI receptionist. All integrations are optional but each unlocks powerful features.
Details
Connect your Google account to enable real-time availability checking and appointment booking. The AI checks your calendar before offering slots and creates events when customers book.
If you use GHL, add your API key to sync contacts and appointments. The AI creates contacts and books directly into your GHL calendar.
Customise your AI's personality, greeting, conversation rules, and fallback messages. This is where you make the receptionist truly yours.
A UK phone number is automatically assigned during setup. You'll see it on this page. Forward your existing business number to this number for call handling.
Toggle on SMS to automatically send customers a text after every call — booking confirmations, enquiry follow-ups, or after-hours messages.
If you're a garage, add your DVSA API key in Settings to let the AI look up MOT history by registration number.
- Google Calendar is the easiest way to enable booking — just click "Connect Google Calendar" and authorise.
- You can use both Google Calendar and GoHighLevel — Google Calendar takes priority for availability and booking.
- The AI Prompt Builder lets you set the tone, personality, and rules. Spend a few minutes here to get the best results.
- SMS follow-ups are sent between 8am-8pm UK time only. Outside those hours, messages are queued for the next morning.
- Without Google Calendar or GoHighLevel connected, the AI can answer calls and take messages but cannot book appointments.
- Call forwarding must be set up on your phone provider's side — we can't do this for you. Set it to forward on "busy" or "no answer".
Customise & Embed Your Widget
~2 minutesGo to Dashboard → Widget to customise the chat widget for your website and get the embed code.

Details
Choose from 4 styles: Classic, Modern, Minimal, or Rounded.
Light or dark theme to match your website.
Pick any accent colour to match your brand.
The name shown on the widget header (e.g. "Allison", "Your AI Receptionist").
The subtitle under the name (e.g. "24/7 AI receptionist — talk to us now").
Pre-set buttons like "Book appointment", "Get a quote", "Opening hours" for one-tap actions.
Copy the single-line script tag and paste it into your website's HTML — works with any website builder.
- The widget preview updates in real-time as you change settings.
- The embed code is a single <script> tag — paste it before </body> on your website.
- The widget is ~30KB and loads asynchronously — it won't slow down your site.
Go-Live Checklist
Make sure everything is ticked before you start sending real calls to your AI.
Ready to go live?
Your AI receptionist is waiting. Complete the setup, connect your calendar, and start answering every call — automatically.